
Are you looking for an easy wooden candle holder project? We've got the perfect one for you as this one neither requires woodworking nor welding skills!
DIY Wooden Candle Holder Makes Beautiful Rustic Decor
If there's one thing I discovered in the world of DIY, it's that something may look difficult to do, but it really isn't! This wooden candle holder is a perfect example of that project. At first glance, it looks like an intimidating project to take on. But let me assure you, after you see the steps, you're going to be so excited to make this candle holder!
What You'll Need for DIY Wooden Candle Holder:
- Small Tree Trunk or Log
- Mild Steel Wire
- Tealight candles
- Driller
- Hole Saws
- Drywall Screws
Step 1: Cut wood.
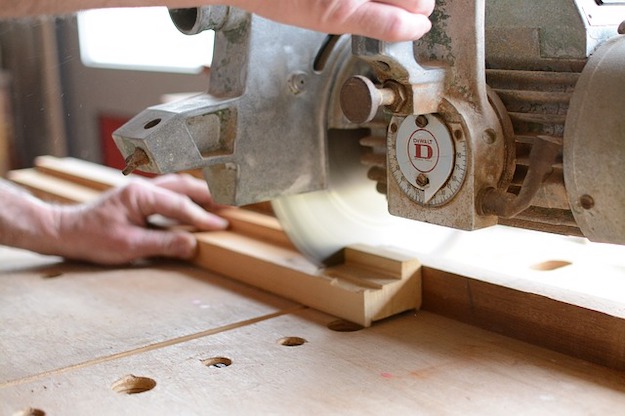
Whether you're using an old tree trunk or a log, cut the wood to your desired size. How many candles do you plan to put? Space the candles out properly to be able to measure how long the wood should be.
Step 2: Drill holes.
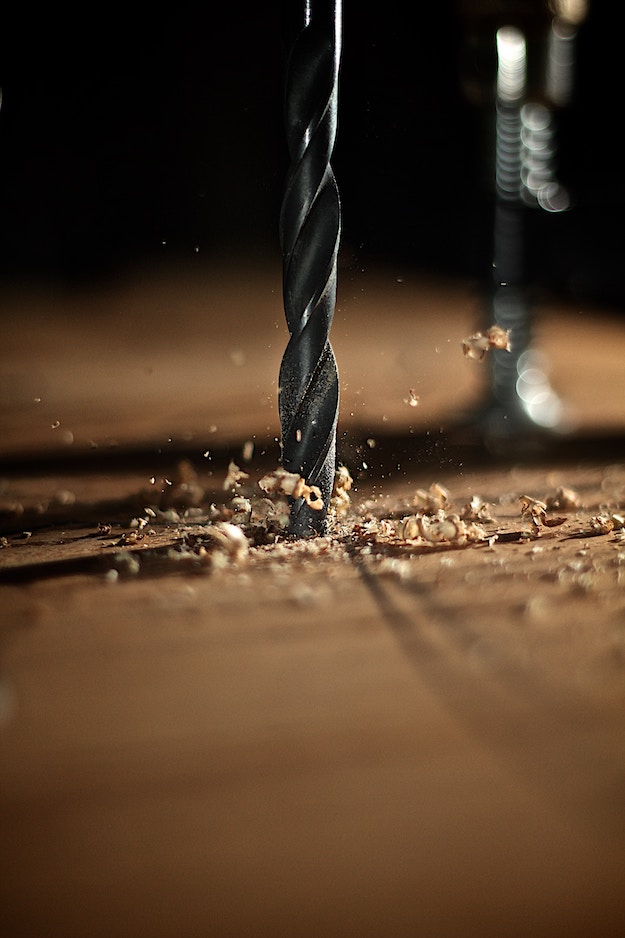
Drill holes into the wood where you will place the tealight candles. Use the appropriate size hole saw to ensure the candle sits comfortably on the log.
In addition, do not drill too deep. Measure how deep the tealight candle is and follow that measurement. Otherwise, you might end up placing the candle too deep into the log and the candle fire might burn the log entirely.
Step 3: Wrap the wire.

Attach two drywall screws on both ends of the wood; this is where your wire must be fastened. Wrap the thin mild steel wire around the wood according to the design you want. Making wire knots here and there can also add style to this DIY wood candle holder.
Step 4: Make the two legs.

The final step requires you to make the legs of this rustic wood candle holder. Using a 1″ metal pipe and a thicker mild steel wire, wrap the wire around the metal pipe. Remove the wire and replace the 1″ metal pipe with the 2″ one. Wrap the steel wire in the opposite direction. You'll know if you've done it right if it looks like an S-hook.
Lastly, use the 1″ metal pipe again and wrap the wire around it. It should be symmetrical to the first circle you made.
Follow the same instructions for the other metal leg. Once you've done both legs, insert the edges of the log into the legs.
Finished Project:
And… that's it! You have your own DIY wooden candle holder!
Check out the step-by-step tutorial from Saeid Momtahan:
Who needs to buy candle holders when you can easily make one? Making things can get addictive, which I think is a good thing because it's fun to recreate these DIY projects for friends and family! I love that this project can be done from a piece of wood you can get in your backyard. Plus, there are no special skills required too! The end product is a naturally beautiful piece of handmade work… simple yet charming! Come to think of it, making candles are so much fun too!
What do you think of this easy DIY log candle holder? Do you have another candle holder projects you'd want to share with us? Please let us know in the comments below!
Looking for another fun and easy candle-related project? Here's how you can make your own Fun & Festive DIY Funfetti Candle!
[TAG4]
Stay connected with us on Facebook, Twitter, Pinterest, and Instagram!